Monday, February 15, 2010

The Wonderful Start of Snowmobiling Season 2010


WELL, winter has finally arrived, so to speak


First time hitting the trails this year for John and I was January 3, 2010 which was just a short one. We headed out from Barrie and got to Hilldsale.


We managed to run 40kms just to get the feel for the trails this year, not that they have changed much but it's all dependant on the snow.


The only downfall for the day was that John blew a belt, but at least someone stopped to help him get the spare on.
Ok, just need to remember how to post my pics after my wording. Will work on this tomorrow, I'm still exhausted from this past weekends ride.


WOW, cannot believe it has been almost 1 year since I have blogged.

PSP just has not held any interest for me, so it's time to move onto other things.

Will be updating the blog with our snowmobiling adventures for this winter and then not sure what I will do for the summer, LOL

Saturday, April 4, 2009


Managed another tutorial, and now I'm off to work.
Enjoy.
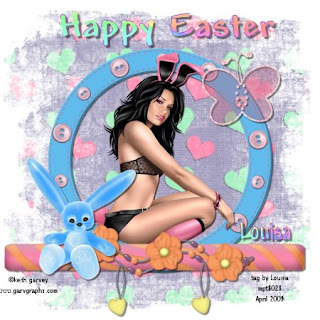
Happy Easter


For this tut you will need working knowledge of PSP, I have used 9.

Supplies:

Tube of Choice: I am using the wonderful work of Keith Garvey.

To use his work you need a license.

You can get one HERE.

Scrap Kit of Choice: I am using the gorgeous FTU Scrap Kit called Candy_Bunnie

You can get HERE.


Drop shadow I have used throughout this tut is 3, 3,50,2.00

Mask used is WSL 83 which you can get here


Let’s start!!!!

Open a new Raster Layer 700x700 transparent.

Open a paper of your choice, copy and paste on your canvas.

Add your mask layer, and on your layer palette delete your mask layer, and merge group.

Open a frame of your choice from the kit, resize and place to your liking.

Add drop shadow.

Open a bunny tube from the kit, resize and place to your liking.

Add a drop shadow.

With your magic wand click inside your frame, paste your main tube, invert and delete.

Re paste your main tube again erasing any overhang.

Add your drop shadow.

Add a butterfly of your choice, resize and place to your liking, add a drop shadow.

Add a candy of your choice, resize and place to your liking, adding a drop shadow.

Add any other elements you wish with a drop shadow until you are satisfied.

Resize, add any wording and your copyright info.

SAVE.

Any resemblance to another tut is purely coincidental.

Written by Louisa
April 4, 2009

Monday, March 23, 2009


Spring Time Fairies

This tutorial assumes you have a working knowledge of PSP.

Artwork Copyright to Butterfly Web Graphics, which you can get here.


I used the Scrap Kit, Happiness, a ftu kit by Jael of Jaelop Designs, Ssroll down until you find it.


You can download the kit here.


Template #4 used is from witchysheart which you can find here.


Font of your choice.

Drop shadow I used vertical & horiztonal 3, opacity 50, blur 2.


Open a new image 650 x 650 and floodfill with white.

Copy and paste the template closing off the copyright layer.

With each layer using your magic wand copy and paste a paper of your choice, then invert and delete, add your drop shadow.

Copy and paste any elements of your choice adding a drop shadow as you go along.

Delete each original layer as you go along to make things easier.

With the tubes of your choice go back and highlight your rectangle rasters and copy and paste your tubes as new layers, resizing, inverting and deleting the unwanted areas.


Add the copyright and your watermark.


Layers, merge, merge visible.


Save and your done.


Written by Louisa, March 23, 2009

Monday, February 16, 2009


Easter


Supplies needed:PSP (I used PSP 9)


Tube or image. I used the art of Butterfly Web Graphics which can be found


Scrap Kit- I used Happy Easter by http://designerscraps.com/


Open a new canvas 700x700 and flood fill with white.


Open up a frame you would like to use and resize if necessary and paste as a new layer.


With your magic wand, selections, modify expand by 8 and paste your paper of choice, invert and delete to remove excess paper.


Drop your paper below your frame layer.


Selections/select none.


Open your tube, place inside your frame layer, resize and select your eraser tool and erase anything that hangs over.


Add a drop shadow to all layers.
Open up a flower element and paste as a new layer, resize and place it where you like it.


Do the same thing with butterfly element.


Drop shadow on both.


Merge visable, resize.


Add your wording and your copyright information.

Sunday, February 15, 2009

Just discovered that I have been challenged by my friend Deb.

These are the challenge instructions:

Go to your photo folder in your computer.

Go to the 6th folder of the photos.

Go to the sixth picture.

Put the picture on your blog and description of it.

Invite six friends to join the challenge.

Link them in your blog and let them know they have been challenged.

So I will do this challenge, but seriously I have no one to pass it on to as the only ones I can pass it onto have already done this, LOL

My mother is gonna kill me for this one, but then again she does not read my blog.

This pic was taken in 2008 at Wasaga Beach. It had been approx 50 odd years since the last time she was in the water at Wasaga, LOL


So on this final note if you happen to see this, please pass along this challenge.

Thanx Deb
So much time has gone by once again since I last posted.
Busy, busy, busy, is all I can say.
Managed a tag, now need to write the tutorial, LOL


Tuesday, February 3, 2009


Well, here is another tut, just a short simple one, trying to get my feet again after taking a break.
Waiting For You


Scrap kit is ftu, Every Rose which you can find here

Mask I used is WSL_14 which you can get here http://www.weescotslass.co.uk/

Tube I used is from the wonderful artist Angie Monasterio which you can get at CILM
Open up a transparent document 700 x 700, you can resize later.

Copy and paste your paper of choice as a new layer and apply your mask. On your layer palette, delete your mask.

Copy and paste frame 2 as a new layer and add a drop shadow.

Using your magic wand click inside your frame layer and modify, expand by 10.

Copy another paper of your choice, invert and delete, now move your paper layer below your frame layer.

Add the tube of your choice.

Merge your layers visible, add your wording, I used Bickley Font, and your copyright information.

This tutorial was written for those who have a working knowledge of PSP and I have used version 9 but should be able to be done in other versions.
This was written by me on February 3, 2009 and any resemblance to other tutorials is purely coincidence

Monday, February 2, 2009

Wow, here we go again another couple of weeks have gone by and I have not blogged anything.

Been super busy as usual with work and with sledding.

Hubby had an accident yesterday with my sled, so now that is put on hold for awhile, he is ok, thank goodness.

Ok, off to visit a friend then hope to do some psping.

Friday, January 23, 2009

Wow, what another week it has been.

I've been busy with work and they guys are still trying to get my sled rebuilt, LOL

Ok that is about it, short n sweet, LOL

Off to psp land I go.

Saturday, January 10, 2009


Wow, what a day, I managed 3 tutorials, LOL


Waiting for Spring


Tube of your choice, I’m using a tube my Dean Yeagle, which is a ptu and you can get it here http://www.cilm.com/

Scrap kit is a ftu kit called Peacheeee which is here http://captivatedvisions.blogspot.com/search/label/FTU%20Kits

Mask of choice, I’m using Vix 268 which you can get here http://www.freewebs.com/vixpsp/masks.htm


Let’s Start!!!!!!!!

Open a transparent image 700 x 700, we will resize later.

Flood fill with white.

Open one of your papers from your kit and copy and paste as a new layer.

Apply your mask and merge group.

Duplicate your merged layer and on the first one adjust, blur, Gaussian blur, radius 20.

Copy and paste the frame of your choice, I used frame 4, move it up and add a drop shadow of your choice.

Copy and paste the tube of your choice to your liking, and add a drop shadow.

Copy and paste any elements you wish to use and place to your liking, adding a drop shadow to each one.

Resize to 400 x 400 all, and add your copyright and wording that you wish.

This tutorial was written for those who have a working knowledge of PSP and I have used version 9 but should be able to be done in other versions.
This was written by me on January 10, 2009 and any resemblance to other tutorials is purely coincidence


Managed a quick tutorial while waiting to go to work this morning. Hope you enjoy it.


Be My Valentine

Scrap kit can be downloaded from here
The tube I have used you can get here Here, which is by Angie Monasterio
Lets Start !!!!!!!
Open scrap kit on your desk top.
Open a new image 600 X 600 pixels. Flood fill with white
Click on scrap kit, copy and paste raster 2 as a new layer. Resize to 350 X 350 pixels.
Image, Rotate, Free Rotate, right by 15. Duplicate this layer, Image Mirror, merge down
Click on scrap kit, copy and paste Raster 6, paste as a new layer. Drag below your merged layer.
Click on scrap kit, copy Raster 5 (hearts) and paste as a new layer, and drag down below your other 2 layers
Copy and paste Raster 4 as a new layer. Resize to 300 X 300,
Add a drop shadow as follows to each layer 1, 1, 50, 10

Click on scrap kit, copy and paste Raster 18 lace, image rotate, free rotate, right by 90. Place under above layer and erase any overhang. Layer Duplicate, Image Flip. Drop shadow on these 2 layers as before
Click on scrap kit, copy and paste Raster 9, new layer. Move to the right side (see my tag for placement). Drop Shadow
Copy and paste buttons, 10 and 12 as new layers and position to your liking. Drop Shadow same as before.
Copy and paste Raster 15 ribbon, as a new layer. And position to your liking, I placed it in the left top corner.
Copy and paste raster 13 heart as a new layer and resize 58% twice. Place to your liking adding the same drop shadow.
Copy main tube, paste as a new layer. Drop Shadow as before
Select Raster 1 on your layer palette. Add a new layer. Flood fill with color #880a0a, add the mask of your choice.

Mask, delete, Layers, Merge group.
Add the wording of your choice with a drop shadow.
Resize if you wish. Add copyright information

This tutorial was written for those who have a working knowledge of PSP and I have used version 9 but should be able to be done in other versions.
This was written by me on January 10, 2009 and any resemblance to other tutorials is purely coincidence.


Well silly me, I got rid of the pic on the header, was forgetting one little step, LOL
Wowwww, almost a month since I last posted.

Life has been super busy since the holidays.

Not sure what I have been doing but psping and the puter just have not been part of it for me the past few weeks.

Hopefully I will get the mojo going again and write a few more tuts as I was starting to enjoy doing them.

Trying to figure out how to get rid of the Christmas header here, and have tried many different things, but the silly thing must really like being here, LOL

Thursday, December 25, 2008

Photobucket

First and formost, Merry Christmas to everyone who stops by.

It has been a very busy last couple of weeks around the Barrie area.

Between work and the holidays I have not had any time to stop by and post anything not to mention do any tagging.

But the new year is upon us and hopefully I will have more time.

We did manage to get out on the sled last weekend for a few hours and took a few pics, not many though, both John and I are having sled problems, :(

Slideshow and Awards


This is the first award I have received, thank you so much Sue

http://sue311258.blogspot.com/

Photobucket


Wowwwww, are ya ready for this one.

My wonderful friend Deb just sent me this award.

Photobucket


Thank you so much Deb.

http://shilohshepherdbreed.blogspot.com/

And Sue send me this wonderful award as well, to match the first one she sent me. Thank you Sue, your great Hun.

Another awesome award from Deb, thanx so much hun

Photobucket


Another awesome award from Deb.

Photobucket